Showing posts with label construction projects. Show all posts

Wednesday, December 9, 2020

Hitting the Wall

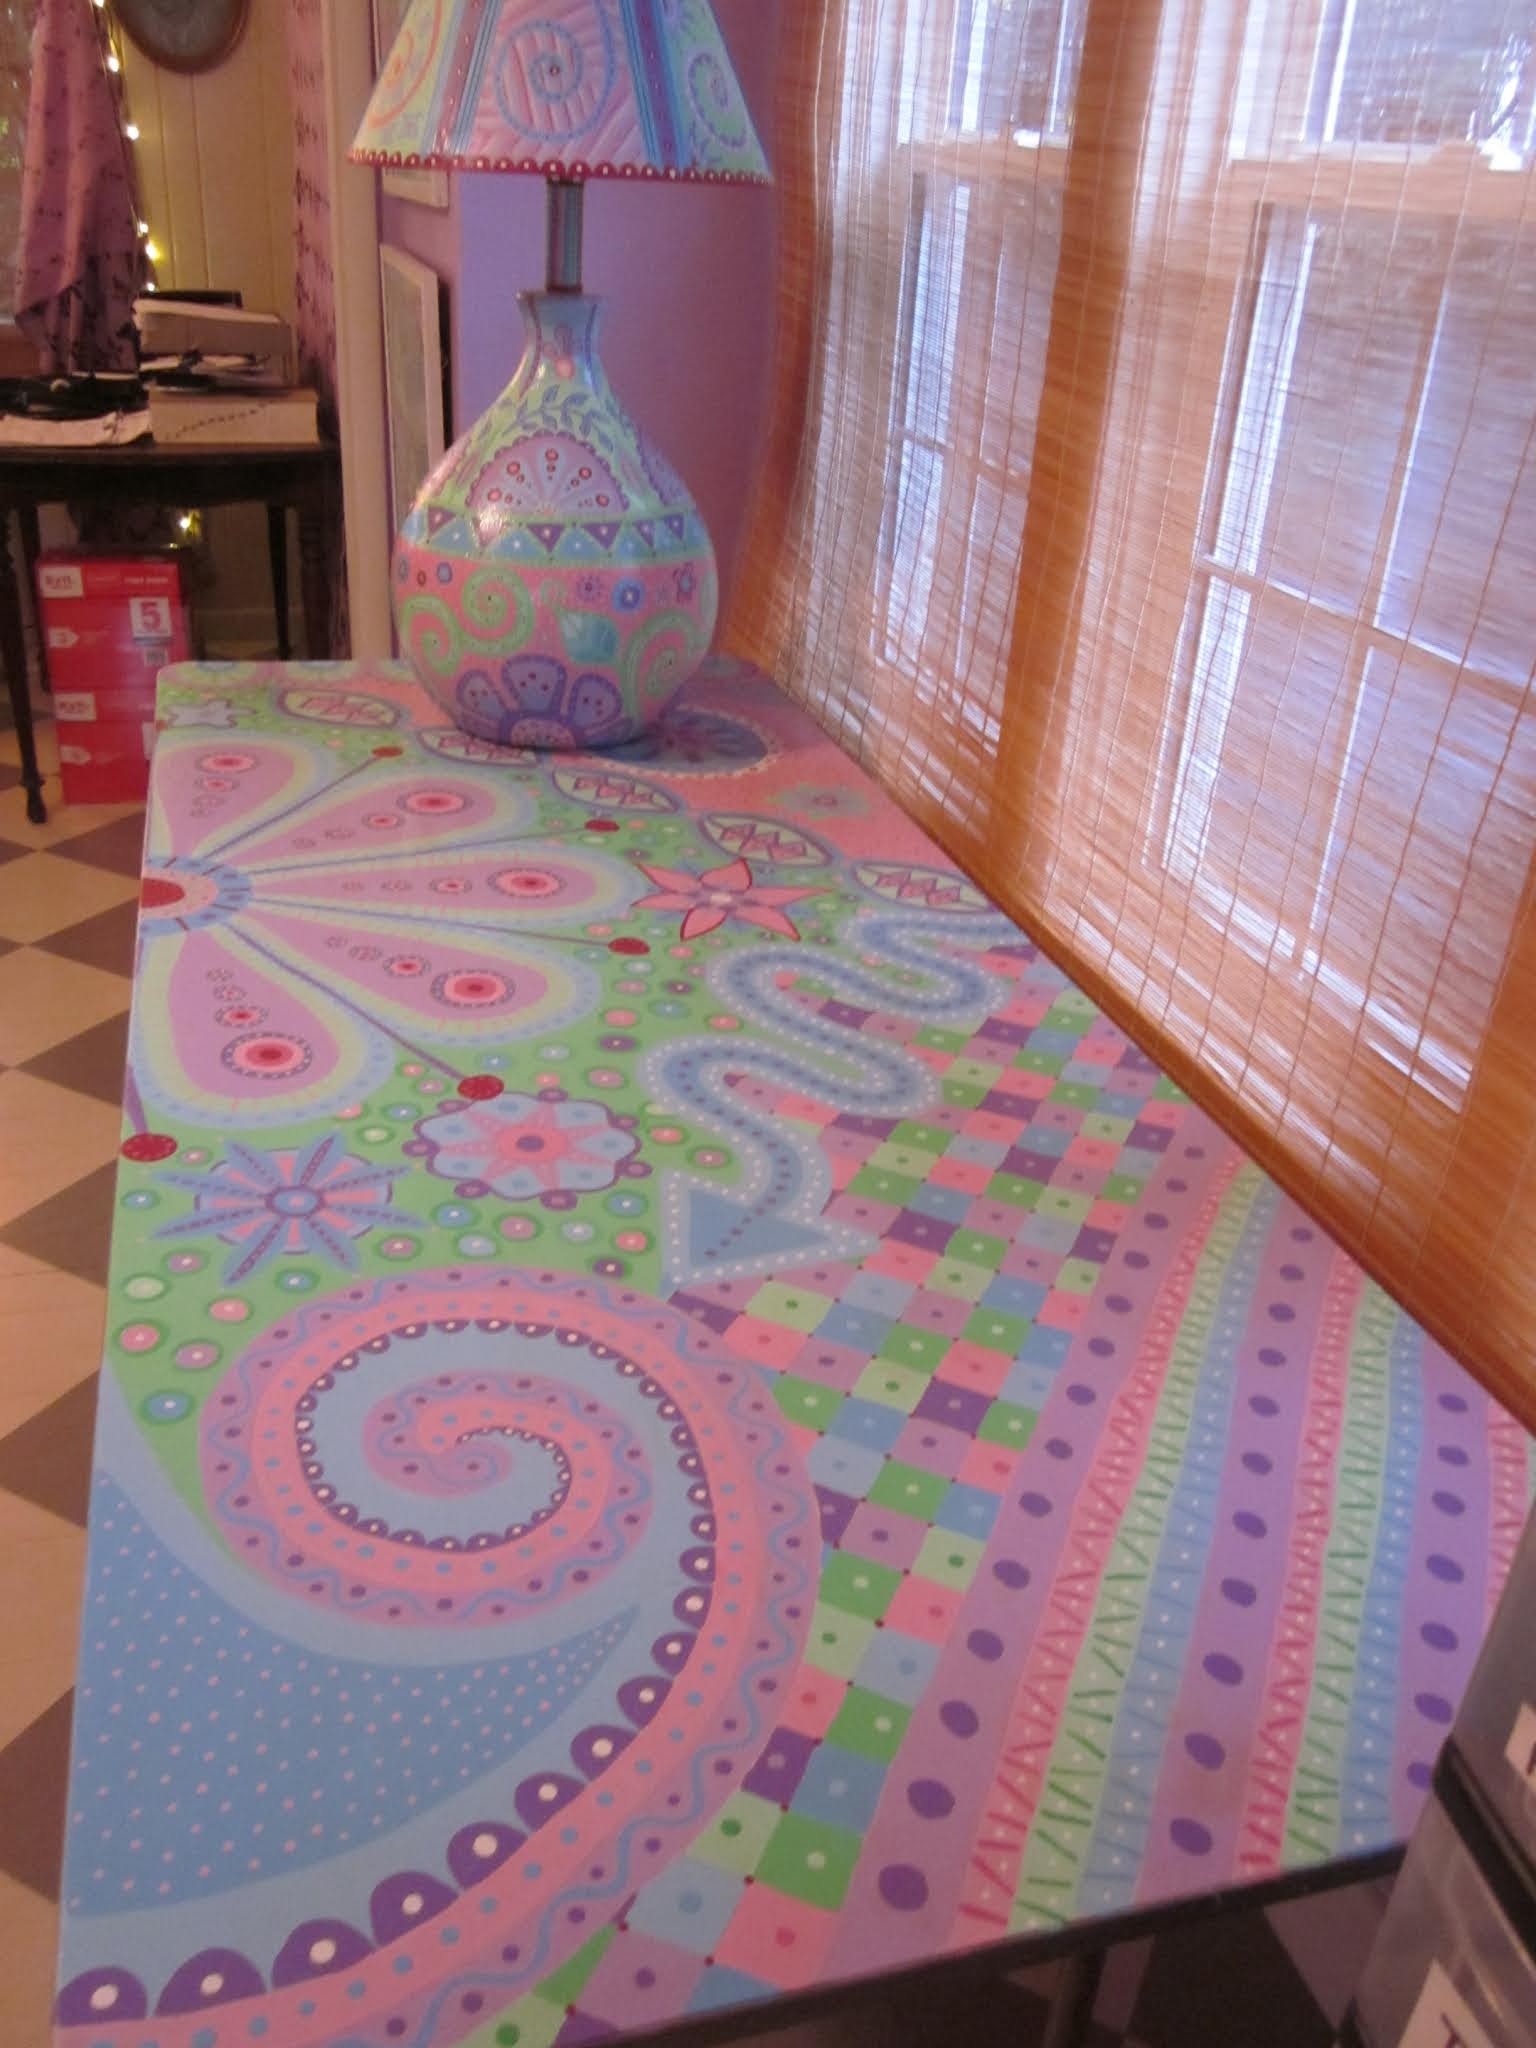
The title has everything to do with walls, but no, I didn't actually hit my beautiful, newly painted wall. I love my newly painted room(s) so much I hesitated hanging anything so I got the bright idea I'd create matching art. First, the lamp:


Then I wanted more of this design and I became obsessed. The wall space behind the lamp needed something hanging since there is a nail there already.

So I'm loving my Happiness Room living room and loving the crazy patterns I'm creating, but I look at my office with the old olive green drab colors and think, Oh! It's a small room! It wouldn't take long to paint! I WANT MORE HAPPINESS IN MY LIFE! I bought another can of Horizon non-toxic interior Latex. Never mind how poor I am. The woman at the paint store asked what I wanted to call it. I said "Pandemic Purple". She tilted her head and looked disapproving. "Virus Violet?" She said, "How about lilac? I really like lilacs." We started talking about our love of lilacs and I failed to notice she overrode all my naming suggestions and went with "lilac". OK. Like a crazed painting maniac, kept painting.

(Ignore the olive green checker floor. I hope to have it stripped and refinished next summer and look just like the living room floor. And the blue in the kitchen...that's be gone sooner than later.)

And, of course, I need to paint my bulletin boards to match. Oh! And my art table! I've always wanted to paint the top of the art table! I keep painting...

The problem with painting all these accessories is I'm using a lot of the Latex interior paint samples which are NOT non-toxic. I know I have an expiration on how much I can handle, usually about two weeks, but it's been over three months since this all started and I'm feeling fine and overconfident. I've been wearing my mask, using gloves and being safe. Then I forgot to wear my mask. And then I wore a mask not good for chemicals. Then I hit the wall. My body became overloaded and unable to function. 

It started with back pain (liver) and like a brain-dead fool I kept asking myself, Is it something I'm eating? Then finally after days of working on the art table, I'm hit with insomnia, nerve oddities, and I'm feeling exhausted but up until four in the morning and again, I ask, Is it something I'm eating? You'd think I'd learn by now.  I kept painting because it's almost done and I just want it done. This is my office so I need to finish and then offgas the room so I can use it again, but the side effects become unbearable and it's clearly the paint. I start experiencing incredible nausea, head spinning, lung pain, and my teeth start hurting. I also urinate all night long every hour, but I do that when I eat something toxic, too. The side effects get worse and wearing a mask longer makes a difference. This is a poisoning. I stopped.


I moved the unfinished art table and bulletin boards to the sealed Happiness Room to air out (I really need my office which is also my entertainment center), and air all the rooms with fans alternating with heat. Immediately I was able to go back into the office without being hit with nausea.

I hit the proverbial wall. I'll wait a few weeks to unload the toxic body overload. I'll take a lot of hot baths, drink a lot of water, drink lemon juice, drink and eat beets and apples, go for fresh air walks, and stay away from paint! Maybe. Eventually I'll have to finish the table and bulletin boards and a lamp for my office and switch plates, oh! the living room needs another painting...and...and...and! And I have one more room to go...the kitchen!! Painting is my addiction.

ARGH!


Three days without painting I was fine and vowed to be very diligent about wearing a mask and keeping safe:


Saturday, November 14, 2020

The Walls from Hell (Construction 2020 Part III)


So now that the hard part was over, two months of stripping and refinishing the floor, I finally got to paint the walls. I thought I had gotten to the easy part. No such luck.

First, I was tormented. I normally don't have problems picking colors, but I could not decide. Maybe it was because I knew I had so many choices...I could do anything. I waffled back and forth making samples, doubting my choices, and asking friends for advice. The problem was I didn't want to prime the walls. Primer is incredibly toxic in small amounts, but a whole room of it would be risky. I needed and wanted to find a color dark enough to cover the dark olive, but not too dark which would defy the whole purpose of the remodel. I wanted bright, but do I want to be surrounded by brightness? If the color was too light, I would need two coats or two cans of expensive paint. I don't want wimpy baby colors even if they are more popular. I even considered white or a neutral beige. Eeewww...although neutrals wouldn't take away from the floor, they are so bland, boring and NOT cheerful. I want cheerful. How can this be so difficult? 

I did about fifteen tests of different colors and different shades. I finally settled on a beautiful, medium-toned turquoise color which is a complementary color to the amber orange of the wood and matches the rest of the house in tone. So cheerful, bright and happy. I even doubted this choice then decided I can either be paralyzed by indecision and not get my living room livable again, or take a risk and just to get it done. Just do it!


I used a paint from Rodda Paints called Horizon. The same paint I used in all the other rooms for the last fifteen years. It normally dries in about two hours with no smell. I bought a gallon of white first and redid the closet. 


I bought a small sample container. The first thing I noticed is the first test of the turquoise sample and the second test of the turquoise sample didn't match. The second test seemed darker and brighter. How can this be if they came from the same container? Maybe it was the light? Then after doing a second wall I questioned this, took a brush full of paint and painted a line over the first sample. It IS brighter and darker! How did that happen? Why is the same sample of paint changing shades? I wondered if I did something wrong? Did I not mix the paint well enough?

I already bought the gallon and since it matched the darker brighter shade and I wanted the lighter turquoise, I mixed some white into the gallon until it matched perfectly and then I added some blue-green! I could help myself. I repainted that wall.

Then I noticed on another wall where I painted the edges and corners was darker than the surface where I used a roller. Clearly the sample and the gallon are different shades. Maybe the two brands of paint are different? Or paint brush and roller cause different shades? I've never experienced this with any other paint and I paint a lot! I repainted that wall.

THEN I noticed where yesterday's rolled painted surface and today's rolled painted surface overlapped, both from the same one gallon of paint. They are DIFFERENT SHADES OF TURQUOISE! GOD DAMN IT! I don't understand how paint from the same container can be two different colors!

By that time I was out of paint so I couldn't repaint ALL the walls and if I attempted to buy more paint, I wasn't convinced it wouldn't be a totally different color and I'd have to repaint the whole room! I thought maybe it just needs time to cure since the first painting session was 24 hours old. I waited until the next morning...no, it still two different tones. DAMN. 

I did not prime the walls first. Primer is incredibly toxic so I like to avoid it if I can. I do wonder if that caused the darker olive underneath to mess with the colors causing different tones. I also think the sample color was incorrect due to previous experiences with that store. I have no idea. It also says on the can that two coats is required. I didn't do two coats except for the re-painted walls. The variations are so subtle it's hardly noticeable, but I did use what was left of the can to try to repaint the wall most obvious. It looks fine.

The paint took DAYS not hours to stop stinking. Was it the color that was toxic? I know adding color to low-VOC paints makes them more toxic. Maybe turquoise is just toxic? Or does Horizon have a new formula? The white stunk, too. I don't know. I hesitate to recommend it now since it used to be very non-toxic. I think I'll name the living room "Toxic Turquoise."

THEN I noticed I dripped drops of paint ON MY NEW FLOOR! I had at least 99% of the floor protected with cardboard, sheets and plastic, but the tiny part not covered gets drops of paint on it! I don't even know where that white paint came from as I painted the closet before the floor was done. So I sanded it off and refinished those spots.

DONE! I LOVE THESE WALLS!!


Its former self.

The Happiness Room

Bright and cheerful. Even when the lights are all off, the walls glow and I love having the brightness. At night the lamp light makes the floor glow gold. It makes me so incredibly happy to look at it. I've renamed it "The Happiness Room." 

Then to tackle the floors in the closet and at the front door. They are covered in linoleum. The front door area seems to have only subfloor and not fir. I don't know about the closet. I did not want to struggle removing the linoleum and the glue so I left it, it's the closet after all. Who cares? I considered laying tile over the front door floor, but having run out of money long ago I decided the next best thing...paint! This might be fun?

I started by testing ideas on the closet floor. No one is going to see it unless I decide to vacuum with guests in the house. (This is where I store my vacuum.)


I thought the design might need browns to match the fir floor. I hate brown. What was I thinking? But I liked the design idea.

After much consideration, I chose rock painting designs in colors I enjoy: in three shades of turquoise, green, purple, aqua, pink, white and red (to match the door). I used all my sample paints. I covered it with the floor finish and I hope this works. It's says on the can it can be used on paint, but it also says it shouldn't be used on linoleum. I did worry as I applied it would start bubbling or peeling the paint but no such drama occurred. Well, if it doesn't work, I can always tile over the whole thing. It's fun (and scary) to be adventurous!


This was the design I had hoped to paint the porch, but I did the porch just after the virus so I didn't feel I had the energy. So joyful. 


Then the molding...Ten years ago I removed an old wall heater from this area and they had cut out the molding so I've had a hole in the molding for the last ten years. I patiently looked in architecture reclamation stores for antique molding but there was never anything I could use that would match. So I got a bright idea, better late than never but I'm not sure why it too me so long to think out of the box: find a piece of wood that is the right size and sand the beveled edge to match. That proved to be a challenge as it seems most wood is 1/4" or 3/4ths " smaller than what old houses have. I finally found wood! Sanded the beveled edge and painted. Hooray!


I was so happy with that I bought a bunch more wood and added molding to the whole closet!


ALL DONE! Well, sort of...

Of course, now all my old furniture looks dull and lifeless next to the floor and wall. All my decorations, pillows, painted objects, wall paintings, and accessories don't match. I knew this would happen which is why I put off this remodeling project for so long. I removed almost everything, shoved it all in a closet until the next garage sale, and kept just the bare minimum. I plan to design a table, paint a lamp, recover a footstool and find things that match, slowly and inexpensively. What I didn't expect is I have no desire to put anything on the walls! I don't want to cover them! I do plan to paint some paintings for the room. Eventually. Maybe. Does this mean I get to go shopping?

I'm looking forward to the next lockdown now that I have a happiness space. And maybe I'll paint my office a bright shade of purple next?


Saturday, October 24, 2020

The Floor from Hell (Contruction 2020 Part II)

After months of hibernating and isolating in my house, I decided the living room needed to be less dark and more cheerful. I thought one can of low-voc brightly colored paint would do the trick and not cost too much. The dilemma was the dark green floor. How to match it? Or should I eliminate it? Old photo:


I failed miserably at assessing the work and the cost...then it snowballed into the project from hell! 

When I first moved into this house, the rug was so smelly and toxic I ripped it out. I thought this was a good idea spying a corner of the floor - Oh, antique fir floors! They are beautiful. The first rip of carpeting I realized beyond the one foot perimeter, the rest of the floor was covered in 1920s thick, black, hairy glue on top of petrified wax. 


Long ago people used real wax to varnish their wood floors. Rugs were held in place with mohair pads and they were glued right to the floor. One hundred years later and it was an ugly mess! I couldn't figure out how to remove the hair and the glue let alone the wax so instead of hiring someone at $1800 which I could not afford, I sanded the whole room (which did little but gum and clog the sand paper) and then painted over the whole thing with porch and floor paint. A can of paint cost $36.00 and at the time it was a good, temporary solution. This painted floor has lasted fifteen years and would have lasted longer if I hadn't decided stripping it was a sane idea. I loved the dark green floor and earthy, woodsy tones (see photo above). For a while anyway....then my couch was set on fire which changed my attitude.

So the floor...is stripping it even possible? Would refinishing it poison me? It's always been my dream and with all my free pandemic time, I felt brave. I started with a half can of Jasco Paint and Varnish Stripper. This stuff is nasty. A drop on your skin and it feels like it's burning down to the bone. But the stink. I didn't think I could use this inside my living space. I tried a sample just to see:


I meant to strip just a square FOOT section as a test, but I couldn't stop. Oh, lord, the floors are so gorgeous even with the glue discoloration! It was like discovering buried treasure. The stripper removed not only the paint, but most of the glue. But stink was asphyxiating! I can tolerate Jasco if used outside with protective gear, but inside it's nasty. My lungs hurt and it stunk up every inch of my house for hours even with the rooms sealed and all windows open and fans on full blast. Then I read on the label Jasco can spontaneously combust and it shouldn't be used on large surfaces...such as floors. Damn. What to do?

I searched online. I found some non-toxic, absolutely safe paint and varnish stripper. Wow! It's even half the price of Jasco! When I saw the demonstrators in the videos spreading it around with their hands I nearly jumped out of my skin and screamed! But it's really safe! It's called MAX Strip.


It still has a faint smell so I wore all my protective gear. Sometimes non-toxic products don't work as well as their toxic cousins, but I was really amazed. Much more efficient than Jasco as it annihilated the glue. 


I compulsively stripped, working long and hard, and then I was hit with exhaustion and full body pain. I totally overestimated my energy levels and ability to scrub on my hands and knees. I slowed down and was able to only do little bit at a time in between resting for days. It took about three weeks to get it all stripped: 


Then to sand it. I tried my little hand sander but it would have taken me months. I tried my friend's belt sander which ate my floor removing chunks of wood in the process.  Because I had such a difficult time sanding the last time, I sought professional advice. I was told the wax will clog a sander and to wash the floor with mineral spirits. Water should never be used on wood anyway. It stinks so I wore gloves, mask, and goggles. It dries in about thirty minutes.

I rented a large random orbit which is the only kind to use on fir which is too soft and splinters easily. It was five hours of hell wrestling to control an exceptionally heavy machine that seemed to have a mind of its own. My lungs, sinuses, and eyes burned for days from the dust. Dust on every thing covering the walls, window ledges and floor. Never mind the cost of renting a professional sander which was about $91 for 24-hour rental including all fees and taxes, and another $100 for three different grits of sandpaper. It goes through a lot of sandpaper!

Oddly enough sanding seemed to accentuate all the problems. The floor sanded almost to white, but the damage was dark. Everyone kept telling me, "It's OK! "Stressed" floors are popular now!" People actually install brand new floors and take heavy chains and beat them to get the look I have. Hmmm...I do like the history of the house is in the floor. I can see where one owner dragged heavy furniture across, another burnt the floor with a wood stove, along with nicks, scratches, gouges, and bruises from a century of heavy use. Did you know fir floors "bruise"? Amazing, like a human. But after five hours, I was done. No more sanding no matter what the floor looked like. In the words of one hardware salesperson, "It's a good thing "stressed" is in." LOL.

Patching holes was problematic. I wanted some kind of clear resin or epoxy, but was told the finish would not adhere to it. I've seen where people use wood filler and it dries an ugly off white so the floors look like they have ugly white stains all over. I hate that. It was suggested to take wood filler and mix some of the wood's sawdust in it so the color almost matches. I tried this and it was still too light so I dug it out all but one hole. I probably should have dug it out of this one, too, but it doesn't matter much. Someone at one point filled in two little holes with I think wood putty which is startling white. I tried digging that out and it was hard as rock so I left it. I considered getting one of those color pens or painting it, but I wasn't sure how to match since the floor wasn't finished yet and I knew it would darken. Finally I just figured it's part of the floor's history and left it all. 

Two white dots of wood putty and top right
is the wood filler/sawdust example.
Better but still too light. Thankfully they are
along the edge of the floor.


Now for the finish. I was told fir doesn't need stain as it has its own color so I was happy to avoid that poison. I found several "nontoxic" floor finishes online. Water-based Varathane by Rustoleum, which is normally really toxic, has produced an "odorless" floor finish. Odorless doesn't necessarily mean safe for a chemically sensitive person. It means they added extra chemicals that turn your brain off so you can't smell the toxins. 

A friend just used it on her rental house floors so I went for a visit a few days after she applied it and...no smell! Then I went to check again while she was applying it to her stairs, and yeah, there is a little smell. I felt my head spin and pinch with one breath and I quickly readjusted my mask. 

While I applied it on my living room floor, I wore protective gear, of course, and after four coats of glossy, I was thrilled! It brought out the amber of the wood and evened out so much of the floor's "wounds." I kept getting up all night and gazing upon the beauty and shine! It took about 9 days for the offgassing. It says on the can normal use after three days, but I waited a week to walk on it and tiptoed gingerly in stocking feet. I wanted to dance vigorously!! So beautiful.

Daytime with Sunlight

Night with Light


Now on to the walls. I can see a bright and happy living room in my future....to be continued.

Wednesday, October 14, 2020

Porch Painting (Construction 2020 Part I)

 After a season of illness, fatigue and fear, I came back in full force tackling home improvement challenges. Well, maybe not full force, but I tried.

First, was the porch. The paint job was worn and peeling. I figured painting was the least exhausting and demanding of all my projects so the first to be tackled. I initially thought I'd do one color, no design, and no effort until I realized I didn't have enough of one color. A pattern usually doesn't show every spot of dirt or muddy footprint so I opted for a simple checkerboard. It was anything BUT simple! The precision was exasperating. But it's done. Does the pattern camouflage every footprint and speck of dirt? No. It shows every spec of dirt, every footprint. I should have done something wild, but I didn't think I would have the energy. I like that it looks like FUDGE!!


Next was the annual fence repair. The constant issues with this fence are relentless and never-ending. Every year parts of it fall down, break or need to be replaced. This year two posts broke and I replaced almost twenty boards. This was a challenge because supplies are difficult to find. Home Depot was constantly out of everything. I had to make several trips. Then I had a moment of doubt. Do I have enough energy to be able to dismantle twenty feet of fencing AND dig out the cement plug AND put it all back together. 

I received some quotes at the beginning of the summer that were outrageous. Then at the last minute feeling like the summer was almost over, I ended up hiring gardeners who claimed to also do things like porch construction and fence building to just replace the two posts. They quoted almost as much as the construction workers, and it was still an ENORMOUS amount of money. When did prices get so high? I said, "No." They tried to tell me it would take them all day. I should NOT have hired them. I hate liars. I know perfectly well how long it takes. They came down and I agreed only because I had to get it done and didn't trust my energy level. I had second thoughts. Once I dismantled the fence myself, I figured I already did most of the work. 


If my phone hadn't died, I would have called them back and cancelled. They arrived on time, but did the cheapest, quickest job possible. It took two hours. Granted it would have taken me all day, but two hours would be normal. As long as I am able, never again will I hire someone! Then I stained all the boards and reconstructed the fence leaving it very tall to save myself some work. It's not a fence...it's a wall. It celebrates the distain I have for my neighbors and made me wish I would have replaced all the boards on that side so they were all six feet high! I love the extra privacy. By doing most of the work I saved myself nearly $1,000.


Next, the deck is rotting. Unfortunately, it also had a hornet's nest under it and before I even started the project I got stung. I poisoned the nasty little beasts and waited. I replaced seventeen rotting boards along with steps and handrails.


Whoever constructed the original deck used the wrong kind of screws and they were rusty and disintegrating. I was worried I wouldn't be able to get the screws out of the wood and it was a challenge forcing me to hacksaw, hammer or break the boards to dislodge them., but I did it. I saved myself hundreds of dollars in labor. Supplies were still scarce and expensive. Next year I'll replace another dozen boards and I'll have nearly a whole new deck!

I felt very accomplished.

Then I got a little crazy....to be continued.

Tuesday, September 10, 2019

Summer Projects

I didn't have many summer projects this year, but I think that is really good since most of the summer it either rained or I was exhausted. I think it rained at least once a week which makes it really difficult to get outside painting done!

In the past two years I painted my house which I admit was crazy...and exhausting. However, as I was informed, I saved about $10,000 doing it myself. Hooray!

This year I had to do the house trim on the dormers which I completed early in the summer and paint the garage. I prepped and cleaned it last year but was just too exhausted to get it done then. Once again I armed myself  with gloves, overalls, goggles, and a respirator which can be very hot and uncomfortable in warm weather, but necessary.


So beautiful. Unfortunately with our wet summer and now that the fall thunderstorms have begun, I didn't get to the back. I'll save it for next year. No one looks at the back anyway, it was done in indestructible oil-based paint, and it has no damage so it can wait. It also needs new fascia boards so that's also on my list for next year.

Tuesday, August 21, 2018

The LAST of the Summer Projects, or Self-Reliance Overtime.

And the award for most summer accomplishments goes to...

Air vent in roof
Closet walls lined
Fence gate post replaced
Two loads of bark for garden
Rodent control and pinwheel construction
Bleach and scrub garage
Side of house painted
Whole garden weeding

Oddly enough, as I read that meager list it really doesn't look like much especially if one doesn't take into account the energy and strength one must have for some of the construction projects. And toxicity. Let's not forget toxicity. Still, I'm patting myself on the back because I can't believe I didn't collapse after the first couple endeavors.

Of course, I've been adding projects, too. I painted the dormer roof walls. I had planned to save those for next year, but they looked so small I thought Why not?


It was absolutely NO FUN to precariously balance myself on that tiny roof ledge and pray I wouldn't topple over with a serious case of vertigo. A couple times I almost did.


Or lay along the roof and try to reach up into the corner! For such a small area, it sure was filled with challenge, BUT it's done! The only thing left to paint on the house are those fascia board trim (see above photo...looks like crap) but those will wait until next year along with the garage.
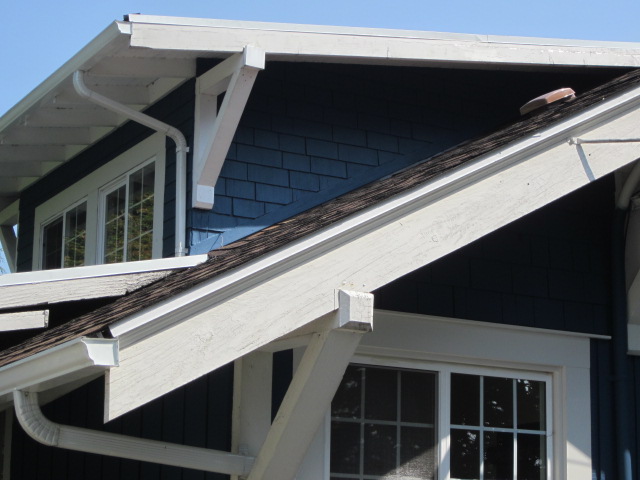
My next and last project which is another one I added to the list was to re-aluminum seal the dormer roof. I was going to wait until next year but when I started dancing on the upper roofs to paint the dormer walls, I noticed the flat roofs have tiny, hairline cracks. I don't want to wait.

This was HELL. Literally. Burning fires of hell. I washed the roof, but when the hazy ash blew in from local forest fires, I was afraid after a week the roof was too dirty again and the aluminum would peel. So I washed it again. Then the nights started getting cold and it didn't seem like it was dry enough. Finally, yesterday afternoon the roofs were dry and clean all at the same time so like a fool in 90 degree heat in the middle of the afternoon I jumped in (or rather, UP) and went to work.


Half way through the top, larger roof I was honestly afraid I would suffer heat exhaustion! I kept taking breaks and splashing water on my skin and drinking cold water. I couldn't remember what kind of roller I used in the past and the ignorant hardware sales boy sold me a thick one...WRONG...it splattered aluminum silver all over. I was covered in smelly, petro-based aluminum. I ended up having to throw away the pants, the shoes, and the socks I was wearing. All that dripping and splattering ended up being tracked on my floors. What a mess!


And I don't think I should have done it in such hot heat. The directions say don't apply it in temperatures exceeding 110 degrees...OK...I noticed when I'd roll it, it seemed to dry too fast and harden making thin, even rolling impossible. Still, it's done. I hope it's good enough and it doesn't start peeling. It's not there to look good, just protect the roof.

Paint dormer sides
Re-seal aluminum coating on roof
Scrub kitchen, bathroom, laundry room, pantry tile floors

FINISHED!! That's it! Everything else I want to do should be much more fun!

HOORAY!!

Tuesday, August 7, 2018

Constant Self-Reliance

You might be wondering why does she keep writing posts about mundane home improvement projects? I'll tell you why:

1.) This is summer entertainment. Yeah, I think most chemically sensitive people might find something better to do, but for lack of fragrance-free opportunities and fragrance-free friends, this is it for me!

2.) I love being productive and saving money at the same time.

3.) The older I get the less I'll be able to do these kinds of things. I want a record so some day I can look back and say, Jeez, I was so energetic...young...self-reliant!

It was my number one goal this summer to paint the LAST outside wall of my house. Last summer I actually did three walls and my whole body was in excruciating pain for at least four months.

Before I start painting I never really notice how badly it needs to be done. Once I start and can compare the before and after sides, it's really obvious! Of course, the white primer spots make it look twice as bad!

NEW.........................OLD

This side doesn't get the hot sun for most of the day so I was hoping it would be easier in terms of preparation. No such luck. The previous paint job was sprayed and the painters sprayed right over spider nests, left glitches all over the trim, didn't take the time to control drips, and some of the paint is so thin the old color shows through. I kept seeing specks of beige wondering if something was growing on the paint, but it's just the old color not quite covered. This is why I have little desire to hire professionals who are rarely professional here. No one has integrity. They want the most money for the least amount of work.


It was also difficult because of this overhang blocking access. It was really, really scary to perch up on that tiny three foot roof while I painted which is why I put off this summer job for so long! And of course, when I did have this roof done ten years ago I didn't bother to get up there and check the job...such crappy work they did on the flashing leaving nails exposed! I'm not sure if I would have even known it was poorly done back then. I've learn so much over the years usually the hard way.


It was also difficult because of the garden below which is wider than the other gardens so getting stable footing for the ladder was a challenge. The camellia bush blocked a section so I cut it back a lot. I was really tempted to cut the whole thing down a few times just to get it out of the way. The garden is pretty trashed from walking through it. Oh well! It'll come back.


And then there is the sweating. Now that I'm guzzling water all day long, I sweat like a pig. I don't remember sweating profusely last year with water literally dripping off my body, in my eyes, making my mask wet, rolling down my arms and legs, and making my protective glasses fog. Blah. It just adds to the discomfort.

Hooray for the biggest project checked off my summer list!

I still have the dormers, some of the trim, and the garage to paint. These things may have to wait until next year.

I'm exhausted. But so proud! And self-reliant!

Sunday, July 22, 2018

Self-Reliance Repeat, or "I Am Woman, Hear Me Roar"

The closet with the new vent is now lined and I am so proud. I shouldn't confess this, but I had to cut each board individually and I was so profoundly inept at measuring I was forced to traipse up and down the stairs at least FIVE times for each board. Measure, check, wrong, adjust...measure, check, wrong, adjust, repeat, repeat, repeat. I know there is a trick to measuring wood, a secret, but I have no idea. I just fly by the seat of my pants. It was exhausting. But it's done. And beautiful:

Back wall, side and ceiling view.


Inside wall view.

I don't think I'm going to paint this closet like I did the others. The paint stinks, and more importantly, it took about two years before the other closets stopped stinking. I'm liking the pine wood smell. So glad that toxic stink is gone.

It still gets hot, but not nearly as much, and it cools down much faster.

So proud! So exhausted...already. I still have about ten more projects on my summer list. Not sure how far I'll get.

Sunday, July 8, 2018

More Self-Reliance

I called and made an appointment with the local roofing company to get a quote on my roof, or rather adding a vent to my roof because a crawlspace gets so hot the neighboring closet feels like an oven and a STINK permeates the whole upstairs including my bedroom. It is unbearable. Not to mention a little scary and toxic. It's not a hot wood smell as the last construction worker tried to tell me. I know what wood smells like. It's either insulation or this ugly, cheap paneling that looks like it is plastic laminate. Although I remodeled the closets on the other side of the house, I saved this one. This roasting/stinking problem only started after I sealed up that crawlspace to keep the bees out and in turn, removed what little ventilation there was. Last year I left a hole from old electrical wiring open and covered it with wire mesh, but it's still not enough ventilation.

This closet is a lot smaller than the other two on the other side of the house with a small four foot sliding wood door as an entrance. I've never used it for anything.

So, the night before the appointment I decided maybe I should investigate the problem more than half-ass so I opened the closet and ripped out the ceiling (cheap, ugly paneling). WOW! There is a ventilation hole in the ceiling that was covered the last time the roof was done. (See below photo.)

In this photo I already started putting new wood lining at the back which is why those boards are so bright. The side showing is the cheap, ugly paneling. The closest paneling is like a cheap wood laminate, but the paneling farthest away has a plastic film. Gross. Underneath there is insulation...awesome. I don't have to buy insulation for this closet.


The wall to the left is quality solid wood bead board
probably original from the 1920s. This closet
will be much less work to remodel.

AND there was plastic stapled to the ceiling. Hmmm...that gives me pause. Was it leaking? I can't see any water damage. I wonder if someone didn't install the roof vent and it leaked? I hope that is all it is. The back wall used to be open to the crawlspace so if it was leaking maybe that's why no one replaced the back wall of the closet? This, unfortunately, is why I am willing to hire a professional roofer to solve mysteries and do the job right.

Unfortunately, the roofing guy didn't show! Am I surprised? I use the word "professional" carelessly when describing local construction people.

I'm on my own. Actually seeing the old vent placement gives me confidence. I decide to watch a few videos on how it's done. Since I ripped out the ceiling paneling it doesn't stink nearly as badly so I'm looking forward to ripping out the wall paneling and replace it with wood. Funny how small projects tend to domino into bigger ones.

After gathering supplies and preparing, it only took about two hours and an hour of that was trying to cut through four layers of composition tile. That alone was exhausting.

Those white dots of caulking should dry clear...I hope.

Inside view.

It's going to be a hot day today so let's see how it works. And then I'll be looking forward to rain to see if it leaks.

I saved $150.00. I am so proud!